


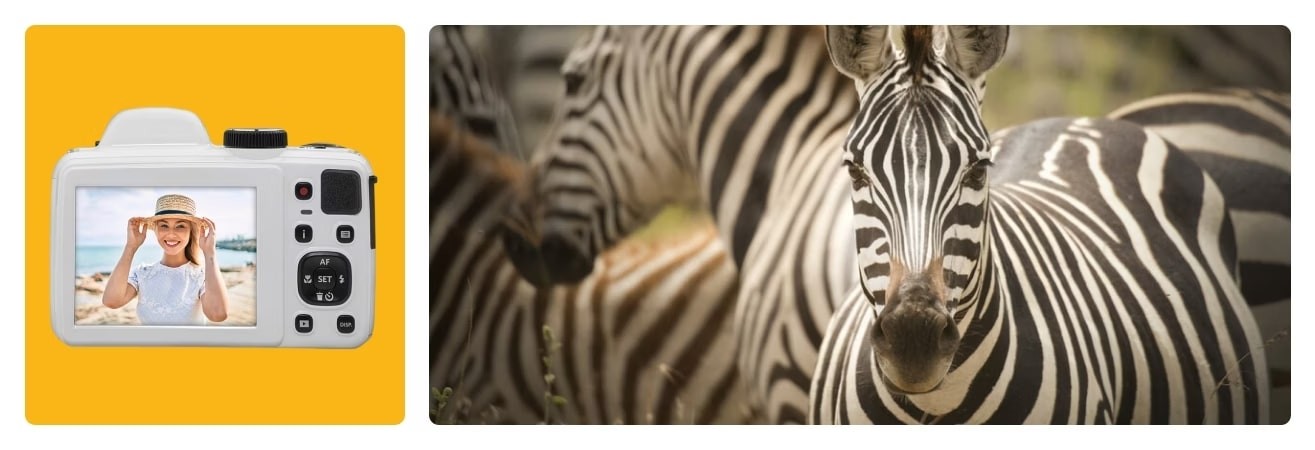
Understanding white balance in photography
You've probably seen a photo taken indoors where the walls appear orange-yellow, or an outdoor portrait with a bluish skin tone. These strange effects aren't necessarily due to a poor camera, but rather to a setting that is often overlooked: white balance.
This essential setting allows you to reproduce colours accurately, regardless of the lighting conditions. Without it, tones can quickly shift, turning a realistic scene into an unrealistic image. The good news is that it's not just for experts. Whether you use a compact, bridge or SLR camera, understanding how white balance works can change the quality of your photos. This is especially true for photos taken in natural light.
What is white balance in photography?
Understanding colour temperature
Light is never neutral. It has a temperature, measured in degrees Kelvin (K), which influences the overall hue of a photo. Light that is considered ‘warm,’ such as that from an incandescent bulb, is around 2,700 K. It has a yellow-orange cast. ‘Cool’ light, such as daylight or light from an overcast sky, can be as high as 7,000 K and has a bluish cast.
It is this temperature that creates a colour cast on your images. Without correction, it can transform the atmosphere and sometimes distort reality.
Accurate colours thanks to a well-adjusted white balance
In photography, light directly influences the rendering of colours. A white wall photographed under a filament lamp may appear yellow. A face in the shade in broad daylight may appear bluish. These differences have nothing to do with a technical fault. They are often due to an incorrectly adjusted white balance.
The human eye naturally adapts to these changes. The camera, however, needs a little help to interpret the ambient light correctly. This is exactly what white balance does.
This setting neutralises the warm or cool tones in a scene to restore the true colours. A red dress retains its colour. A face looks natural. A white wall does not turn yellow or blue.
Indoors, in the shade or in mixed lighting, this correction is essential. It ensures that your photos are accurate, balanced and free of surprises when you view them.
AWB: practical, but not always reliable
Most cameras offer an AWB (Auto White Balance) mode. It analyses the scene and automatically selects the correction to apply. This mode is very useful for everyday use, especially outdoors with uniform natural light.
But it has its limitations. When taking a photo indoors with multiple light sources (lamps + daylight), or at night with urban lighting, AWB can get it wrong. It can also hesitate in high-contrast scenes or when there are few neutral colour references.
This is why it is sometimes useful to take control of this setting. A small manual adjustment can make all the difference between a mundane photo and a faithful or expressive image.
As you can see, sometimes it's not enough to simply know how to frame your photos. You need to go a little further in understanding your camera.
Common white balance errors
Why do some photos look too blue or too orange?
This is a common situation. You take a photo indoors, and the faces look orange. You photograph a landscape in the shade and everything looks blue. In most cases, this is due to incorrect white balance settings.
The camera has not interpreted the ambient light correctly. In mixed light (sunlight + light bulb), or under artificial lighting (LED, halogen, neon), the automatic setting can be wrong. It applies a correction that accentuates the dominant colour instead of correcting it.
Each type of light influences the colours in the image:
-
A halogen bulb tends towards warm yellow.
-
A cool LED gives off white light, sometimes with a slight blue tint.
-
Indirect light in the shade enhances cool tones.
-
An overcast sky can flatten colours and create a grey-blue cast.
If the white balance remains in auto mode, it may not handle these variations well. This explains why colours appear too warm or too dull.
Concrete examples to correct
A family meal indoors, lit by standard light bulbs, can result in orange-tinted photos. This type of tint is unflattering for faces. It makes colours appear yellowish or burnt.
Conversely, an outdoor portrait in the shade can make skin tones appear very pale, almost blue. Even if it is not cold, the image gives a distant, unnatural impression.
In both cases, a simple white balance adjustment would have been enough to restore more accurate colours.
It is important not to confuse white balance with exposure or saturation. White balance affects the colour temperature, i.e. the overall hue of the photo.
Exposure determines whether the image is too dark or too light. Saturation changes the intensity of the colours without changing their tone. An image that is too blue is not a saturation problem, but a white balance problem. And if a photo lacks light, this is not the setting you need to adjust.
If a photo looks too blue, it's not a question of saturation. And if it's too dark, it's not related to the white balance.
What about ISO?
ISO measures the sensor's sensitivity to light. Understanding ISO is important for taking good photos. It doesn't directly affect the white balance, but it can have an influence.
At high ISO settings, some sensors add noise or slightly alter colours. This is not intentional, but rather a technical consequence.
To put it simply: white balance and ISO are two settings that need to be monitored together, especially in low light.
How do you set the white balance correctly for a given situation?
Convenient preset modes
Most cameras, including compact and bridge models, offer preset white balance settings.
These modes allow you to adjust the image to the ambient light without having to delve into the manual settings.
The ‘sun’ mode is suitable for direct natural light. ‘Cloudy’ helps correct blue casts from an overcast sky. ‘Shade’ warms tones in areas with little exposure. “Tungsten” is used with incandescent bulbs, and ‘neon’ neutralises greenish or magenta hues from artificial lighting. Finally, the ‘flash’ mode softens the very white light of the built-in flash.
These options are useful once you know the main source of light. Outdoors, simply choose between “sunny” or ‘cloudy’ to achieve a faithful and natural result. It's quick, simple, and often very effective.
Manual white balance: greater precision
If the light is mixed, or if you are looking for a very accurate result, it is often best to set the white balance manually.
This can be done directly on some cameras or via more advanced smartphone apps. The principle remains the same: you need to tell the camera what a true neutral colour is. To do this, use a white sheet of paper or a neutral grey chart. Photograph it in the ambient light, and the camera will use this reference to adjust all the colours.
This method requires a little more preparation, but it is very reliable, especially in the studio for portraits or product photos.
A simple tip: test before shooting
Before you start shooting for real, you can take a test photo. Check the tones on the camera screen. Is the white really white? Does the face look realistic?
If not, you can adjust the balance or plan to correct it in post-production.
Why shooting in RAW changes everything
RAW is a raw format that retains all the information in the image, including white balance. Unlike JPEG, it allows you to correct colours without degrading the quality.
You can freely adjust the temperature and tint, just as if you were adjusting the settings before shooting. This is a valuable asset for photos in complex lighting conditions, or for those who want a perfectly balanced result.
Playing with white balance: a creative tool
Adjusting white balance to create mood
White balance isn't just about correcting colour casts. It also lets you play with the atmosphere of a photo. By warming up a scene, you soften the tones and evoke warmth, comfort and a certain tenderness. This is ideal for indoor portraits, winter family scenes, or any image you want to make more welcoming. Simply shifting the white balance towards warmer tones can be enough to transform the feel of a photo.
Conversely, you can cool down an image to accentuate mystery or distance. This choice works very well for urban landscapes, night scenes, or winter settings. Imagine a building under neon lights in a dark alley. By shifting the white balance towards blues, you get a more graphic, almost cinematic atmosphere. These settings are simple but powerful, allowing you to add style to your images without complex editing.
Accentuate an artistic intention
White balance can also be a real styling tool. It allows you to accentuate a mood or artistic intention.
With your camera at a wedding at the end of the day, for example, you can accentuate the warm tones that are naturally present. This will highlight the golden light, the dresses, the flowers, and skin tones, while enhancing the softness and romanticism of the moment.
Conversely, for a snowy mountain landscape, you can cool the image slightly. This will bring out the white and the shades of blue in the sky or the ice, for a pure, immersive, polar look.
These are sometimes small adjustments, but they make all the difference to the atmosphere you want to convey.
Mastering white balance will take your photos to another level
White balance is often a setting that gets overlooked. Yet it's what makes the difference between a colour-accurate image and a photo with strange tones that are difficult to fix. Understanding this setting means learning how to control light to get the best results.
This isn't just for professionals. Even with a compact camera, a bridge camera or an SLR, anyone can achieve accurate, soft or bold colourimetry depending on their intention. The key is to observe the light around you, try out the preset settings, or venture into custom white balance.
So next time you go out to take photos, take a look at the light. Ask yourself if it's warm, cool, natural or artificial. And adjust the balance so that the image looks like what you really saw... or what you want to convey.