


UV filter for cameras : What is it for and how do you use it ?
Protecting your lens and improving the quality of your photos. These are two major concerns for all photographers, whether beginners or enthusiasts.
Long considered essential in film photography, UV filters have not disappeared with the advent of digital sensors. They have simply changed roles. Less commonly used to block ultraviolet rays, it is now valued for another function: protecting the front lens element.
But that's not all. There are other types of filters, such as polarising and ND filters, each with a specific use. Knowing how to distinguish between them and understanding when to use them will help you improve your images while protecting your equipment.
In this article, you'll learn what a UV filter is used for, how to use it correctly, and in what situations it can make a difference. We'll also see how it compares to other photo filters. With simple tips to help you make the right choice for your photography.
UV filter: definition and role in photography
Before we learn when and how to use a UV filter, let's see what it really is. This small, discreet accessory still raises many questions, especially among beginners. Here's what you need to know to avoid confusing it with other filters and to use it properly.
What is a UV filter?
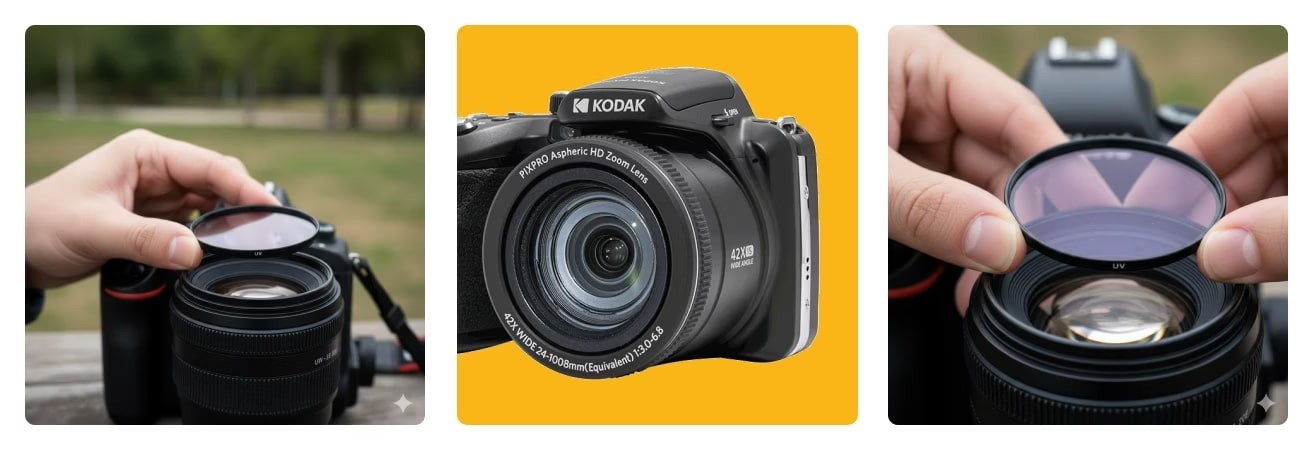
A UV filter is a small transparent glass disc that screws onto the front of the lens. It attaches directly to the front lens using a standard screw thread. Its original function was to block ultraviolet rays. These were invisible to the naked eye but, in the days of film photography, could alter the sharpness or colour of images taken in the mountains or at high altitudes.
With the advent of digital sensors, this function has become less useful. This is because most modern cameras already have a UV filter built into the sensor. However, this accessory has not disappeared. It has simply found a new use, which is just as important today.
Are UV filters good for cameras?
Even though their direct impact on image quality is now limited, UV filters are still recommended for one simple reason. They effectively protect the front lens of your camera. A scratch, a fingerprint or a grain of sand can quickly damage a lens. The UV filter, a very useful photography accessory, acts as a physical barrier. It is much easier and less expensive to replace a scratched filter than to repair a damaged lens.
Take the example of a photographer on a hike. Between the dust on the trail, minor bumps when storing the camera, or splashes when passing by a lake, the risks are real. The same is true at the seaside, where salt spray can leave marks that are difficult to clean. In this type of situation, protecting your equipment with a UV filter is a sensible precaution.
Where should the UV filter be placed?
The UV filter is placed at the front of the lens, directly on the front lens. Simply screw it onto the thread provided for this purpose. Most current lenses are compatible with this type of mounting. Simply check the diameter of the lens, indicated in millimetres, often on the front (e.g. Ø 52 mm, Ø 58 mm, etc.).
Installation is quick and once in place, the filter can remain permanently in place, even when the camera is stored in its bag. It can also be easily removed if necessary.
However, pay attention to the quality of the filter. A cheap model without anti-reflective coating can cause unwanted reflections and a loss of contrast or sharpness. It is therefore better to invest in a well-made filter manufactured with high-quality optical glass.
UV, polarising, ND filters: which one should you choose?
Once you understand UV filters, you will discover that there are other types of filters, each with its own uses. Knowing how to differentiate between them is essential for properly equipping your camera and avoiding mistakes. Here is an overview of the important differences you need to know in order to choose with confidence.
What is the difference between a polarising filter and a UV filter?
The UV filter mainly serves a protective role. It acts like a transparent pane of glass placed in front of the lens. It does not add any visual effect to the image.
A polarising filter, or CPL (Circular Polariser), modifies the final image. It reduces reflections on water or glass, enhances colours and accentuates contrasts. This is particularly useful for landscapes. For example, a slightly overcast sky appears bluer, a water surface reveals the bottom, and a window provides a clearer view of what is behind it.
In summary, the UV filter does not transform the image, while the polarising filter produces a marked visual effect.
Which filter is best for my camera, UV or CPL?
There is no universal filter that is suitable for all situations. The choice depends mainly on the use.
For everyday use, both outdoors and indoors, the UV filter remains a safe bet. It protects the lens without altering the light or exposure. It can remain screwed on permanently, whether you are photographing in the city, travelling or in the studio.
The polarising filter, on the other hand, is used occasionally. It is perfect for enhancing the sky, reducing glare or enriching contrasts in a very bright scene. It is more difficult to use because it works according to the angle of the light. It will also depend on the camera lens you choose and its characteristics, of course.
If you are just starting out or are unsure which one to choose, it is best to start with a UV filter. It provides good basic protection while giving you the freedom to explore other effects later.
When should you use a polarising filter?
Polarising filters are particularly popular in landscape photography. They intensify blue skies, bring out clouds and create a more striking atmosphere.
They are also very effective at removing reflections on water, shop windows or any shiny surface. If you are photographing a lake, a shop window or a car, a CPL filter will reveal details hidden beneath the reflections.
In video, the polarising filter can be used to enhance the contrast of a scene, give a sharper image or reduce overexposed areas. Its impact is particularly noticeable on shiny objects or in very bright environments.
When should you not use a polarising filter?
A polarising filter is not always the best choice. In low-light scenes, such as interiors, shows, or night photography, it can reduce the amount of light entering the lens. This requires you to increase the exposure time, raise the ISO, or open the aperture more. It is therefore not ideal in these contexts.
It can also be counterproductive when trying to capture a reflection that is intentionally present in the scene, such as the light from a fire or the transparency of glass.
Finally, you need to learn how to master exposure management, as using a polarising filter can sometimes change the basic settings of the image. This is an opportunity to better understand how the aperture, shutter speed, and ISO work, so you can get the most out of your polarising filter.
Using a UV filter: tips from a photographer
Understanding the role of a UV filter is good. Knowing when and how to use it in practice is even better. Here are some typical situations and practical tips for easily incorporating this accessory into your photography routine.
When should I use a UV filter on my camera?
A UV filter can be used all year round, but it really comes into its own in demanding environments. At the beach, in the mountains or in a dusty city, your lens is exposed to conditions that can damage it. The filter acts as protection against sand, splashes or micro-scratches.
It is also very useful when children or beginners are around. When the camera is passed from hand to hand, placed on a table or quickly slipped into a bag, the UV filter limits the risks. It allows you to take photos with peace of mind, without fear of damaging the front lens.
Even though its effect on light is minimal with modern sensors, its protective function remains essential. It's a simple, quick step that will extend the life of your camera equipment.
Which camera filter should you choose?
Not all filters are created equal. Choosing a UV filter requires careful consideration. Poor-quality glass can affect the sharpness of your images, introduce unwanted reflections or create an undesirable tint.
Here are the criteria to consider:
Good optical quality, with glass treated to reduce reflections (multi-layer anti-reflective coating)
Perfect compatibility with the diameter of your lens. This diameter is always indicated on the lens (e.g. 52 mm, 58 mm, etc.)
A metal thread, which is stronger than a plastic thread
It is better to invest in a good UV filter, even a simple one, than to buy an entry-level model that degrades the image quality. Remember to combine it with lenses that are suited to your practice, especially if you use a reflex camera. These cameras, which are often more comprehensive, offer more advanced creative possibilities.
Which filter should you use to photograph the sun?
This is a common question, and the answer is clear. A UV filter is not sufficient for photographing the sun directly. Even if you protect your lens, this does not protect your eye or the camera's sensor from the intense light of direct sunlight.
To capture the sun, you need to use a very dense ND filter, specially designed to reduce light intensity. These filters, sometimes called ‘solar’ filters, allow you to safely photograph eclipses or very bright sunsets.
Warning! Looking at or framing the sun through an optical viewfinder can cause eye damage. It is therefore important to take precautions, especially with an SLR camera.
When shooting outdoors, to capture beautiful light without taking any risks, it is best to pay attention to your angle, wait for softer light, or work on your composition by incorporating the sun indirectly. You will find several useful tips on this subject in the Kodak article dedicated to photo composition and framing, which is very useful for making steady progress.
Using a UV filter correctly: a simple step for better photos
A UV filter is one of those discreet but useful accessories. It doesn't transform your images, but it protects what matters most: your lens. It's a small investment that can save you a lot of trouble in the field.
In photography, every detail counts. Learning how to equip yourself properly, understand light, frame carefully and master your settings will help you go further. The UV filter is a first step towards a smoother, safer and more comfortable experience.
And if you like to improve, don't hesitate to explore the other technical tips offered by Kodak. Every step counts when it comes to creating beautiful images, and every image deserves the right equipment.